checkra1n vs unc0ver: Full Filesystem Image by Different Jailbreak Tool
Author: Jerry Chang
Abstract
In order to extract the maximum amount of data from an iPhone or perform Full Filesystem Image, jailbreaking is usually a necessary step. The implementation of jailbreak is to bypass the system security mechanism through vulnerabilities in the iOS device hardware or software. However, Apple may patch these system vulnerabilities in every iOS update and will cause the existing jailbreak tools to be invalid. Therefore, the system vulnerabilities used by different jailbreak tools are usually different. It may also happen that the same version of iOS has multiple jailbreak tools based on different system vulnerabilities. The main goal of this project is to verify the results and processes of Full Filesystem Image based on different jailbreak tools under the same iOS version. This project will use an iPhone 6 plus with iOS 12.1 as an example to perform Full Filesystem Image based on two jailbreak tools, checkra1n and unc0ver, and record the process including wiping the device, jailbreaking the device, populating test data, acquiring images, and analyzing the image. This blog post will record the tools used in each step, including installation and debugging. The final result of this project verifies that the two jailbreak tools checkra1n and unc0ver can be used to create a forensic acquisition. Full Filesystem Image samples made with two jailbreak tools will be available for download at the end of this blog post.
Device information
The device used in this project was an iPhone 6 Plus purchased by the author in 2014. The iOS version was 12.1. Fortunately, there are Two jailbreak tools based on different system vulnerabilities on this version of iOS, which are checkra1n (checkm8 CVE-2019-8900) and unc0ver (voucher_swap CVE-2019-6225, SockPuppet CVE-2019-8605), which fits perfectly with the goals of this project.
Forensic tools and version information
All the tools used in this project are non-commercial except for Beyond Compare 4 which provides a 30-day free trial. The first 6 items in the tool list are used to extract Full Filesystem Image, and the rest are used for image analysis.
Wiping Device
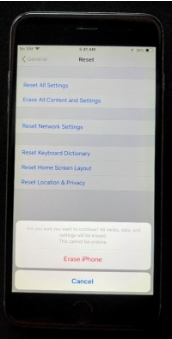
To make it easier to analyze the results and avoid private information, the first step of this project was to wipe the device. The way to wipe was using the iOS function "Erase All Content and Settings." The operation was “Setting=>General=>Reset=>Erase All Content and Settings”. Although this method cannot perfectly wipe every bit of data, it was enough for this project.
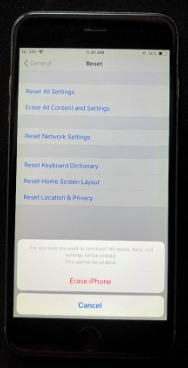


Figure 1. Reset menu and new device set up screen.
Full Filesystem image – checkra1n
After the device was wiped, the next step was to jailbreak the device. In order to perform Full Filesystem Image, the jailbreak is a necessary step. It is also the main goal of this project.
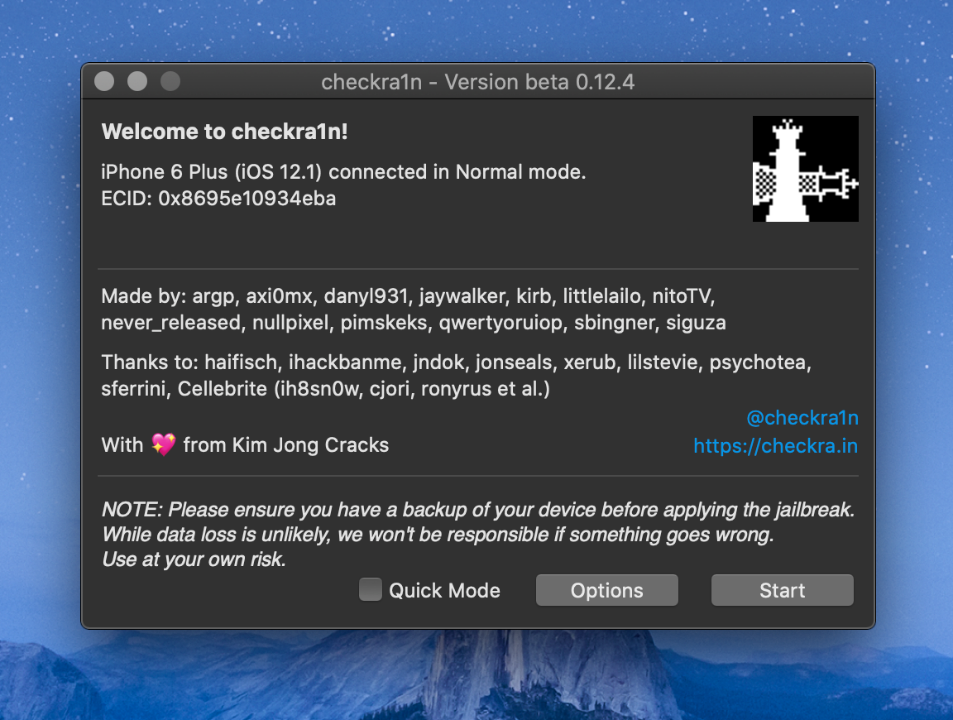
Checkra1n is a jailbreak tool based on the vulnerability checkm8. Checkm8 is a BootROM type system vulnerability and cannot be patched by updating the operating system. Therefore, all iOS devices between A5 (iPhone 5S) and an A11 (iPhone X) have this vulnerability. Checkra1n is known for its stability and is often the first choice for mobile device forensics. The disadvantage of Checkra1n is that it can only run on macOS or Linux. And as a "Semi-Tethered Jailbreak" type of jailbreak, every time the device is restarted, it must be connected to the computer to restore the jailbreak status.
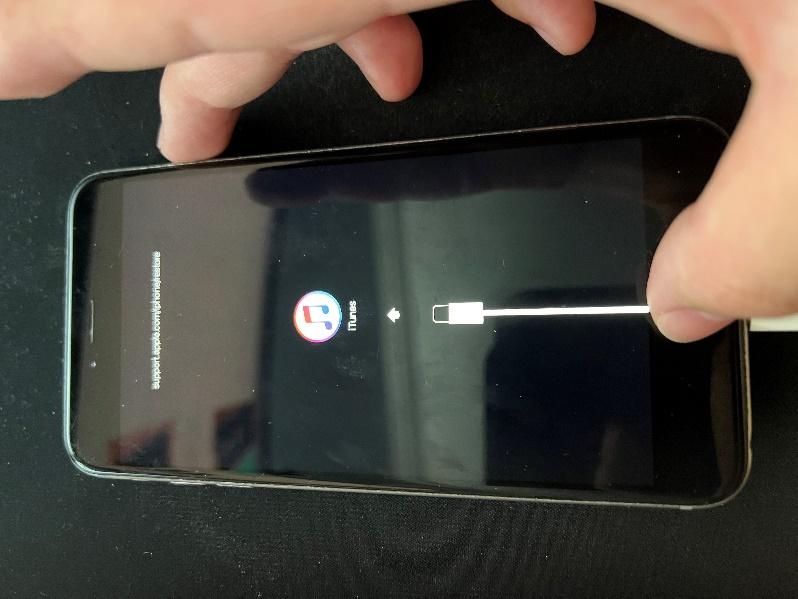
The process of using checkra1n is pretty straightforward. Just download the jailbreak tool from its official website https://checkra.in/ and follow the instructions to put the device into DFU mode. The jailbreak process will be completed automatically.
Install Cydia
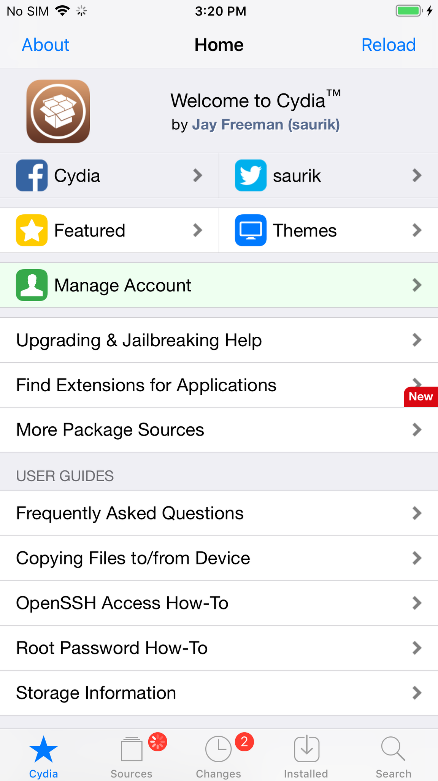
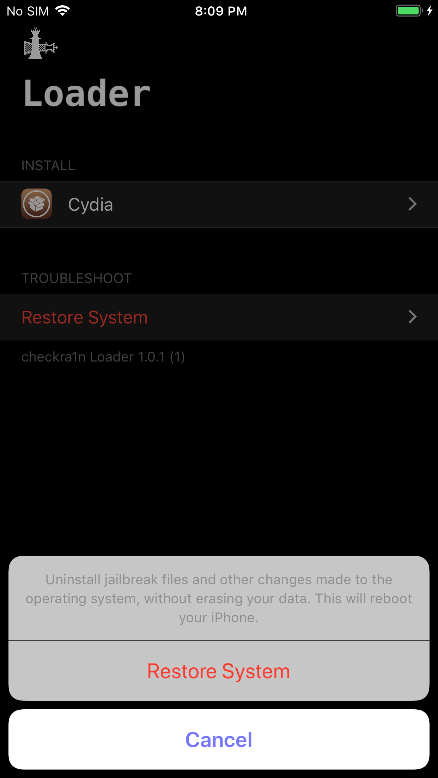
When the jailbreak process was completed and the device restarts automatically, an app named checkra1n will appear on the last page of the springboard. After launching it, click Cydia to install the Cydia AppStore. The Cydia AppStore is the largest platform for jailbroken devices to get third-party applications. It was developed by Saurik in 2008.


Install OpenSSH
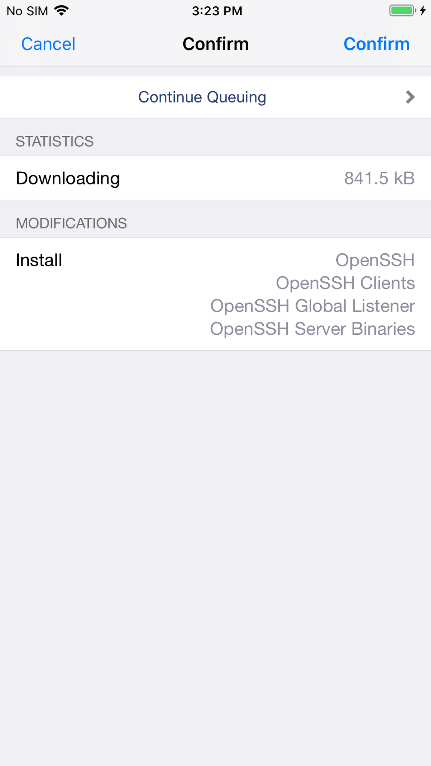
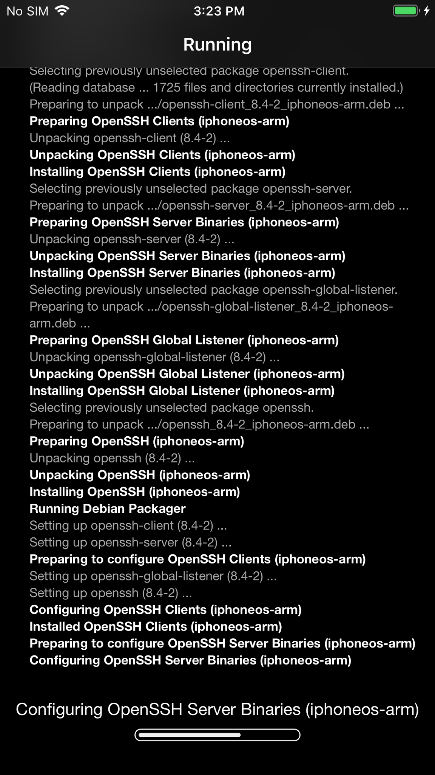
After installing Cydia, the next step was to install OpenSSH from Cydia. OpenSSH is an open-source SSH tool that allows us to access our device remotely. The subsequent process of this project will be using OpenSSH to make a connection between the iPhone and MacBook and remotely extract device data.

Install libimobiledevice
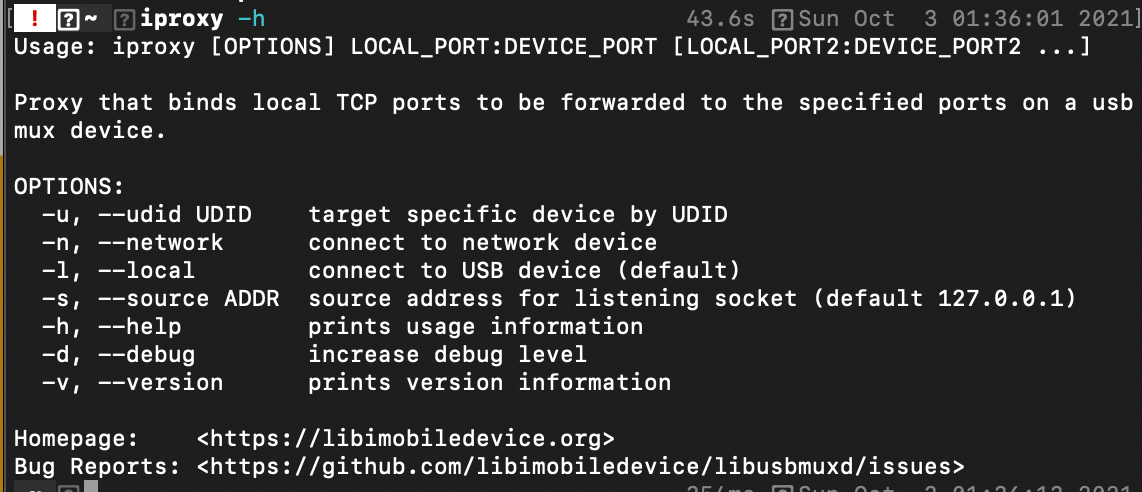
In addition to installing OpenSSH on the iPhone, we also need to install libimobiledevice on the Macbook. The iproxy in libimobiledevice will map a port on the device to a port on the Macbook and make a connection between them.
This project used Homebrew to install libimobiledevice.
The command was “brew install libimobiledevice”.
*Homebrew is a package installation tool developed in ruby. See more information on https://brew.sh/.
**Libimobiledevice also provide an alternative installation of Macports. See more information on https://libimobiledevice.org/#get-started.
Data population
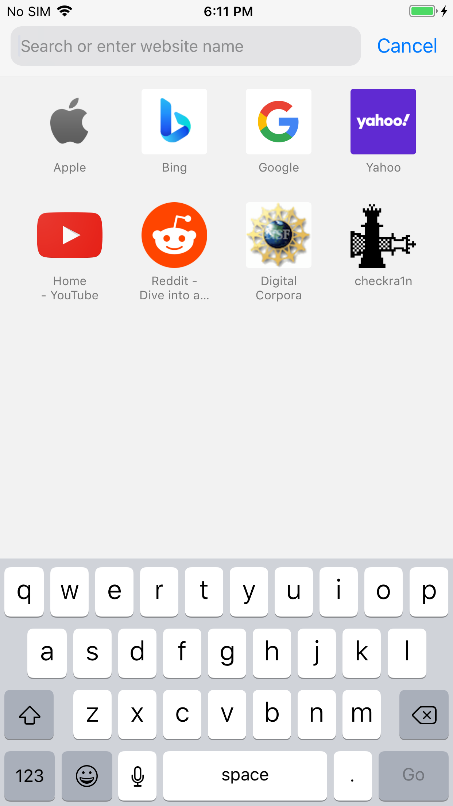
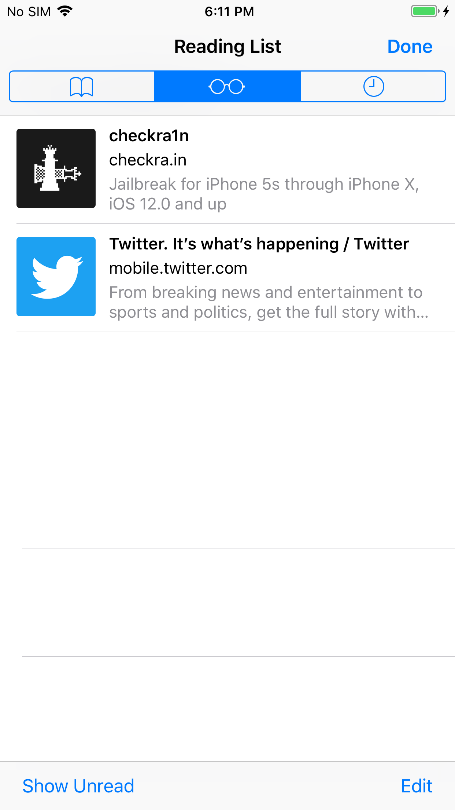
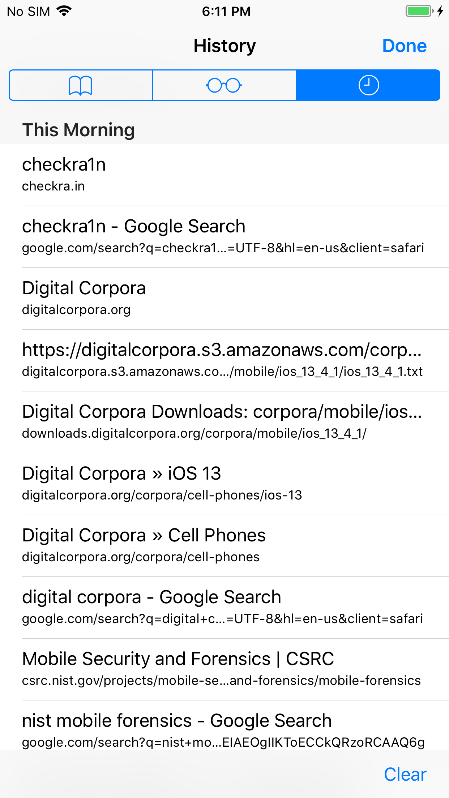
Before proceeding to the Full Filesystem image, as data populating, I added some screenshots in the photo and performed a few operations in Safari, including browsing several websites, adding several websites to bookmarks, and adding several websites to the reading list.
Configure iproxy
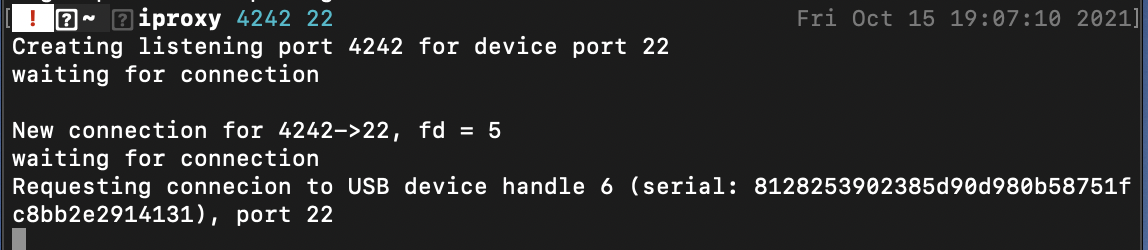
When all the tools were successfully installed, we can start the Full Filesystem image. Used the command "iproxy 4242 22" to set the local TCP port 4242 and device TCP port 22 for SSH connection.
Open another terminal and run the "ssh root@127.0.0.1 -p 4242" command to make an SSH connection.
There were two points that need special attention:
1. The "ssh root@127.0.0.1 -p 4242" command needs to be run on another terminal
2. The original terminal needs to be kept running and cannot be closed.
When the connection was successful, the device will ask for the password for the root account to log in. The default password on iOS devices is "alpine". After logging in, the current identity will be changed to "iPhone:~ root#" shown on the terminal, and there were two folders, “Library” and “Media”, in the current work directory.

Now, we can start the Full Filesystem image.
Exit the SSH connection and reconfigure iproxy and run the command "ssh root@127.0.0.1 -p 4242'tar -cf-/'> [Destination folder/filename.tar]".
Then we can wait for the system to export the Full Filesystem image to a .tar file to the destination path.

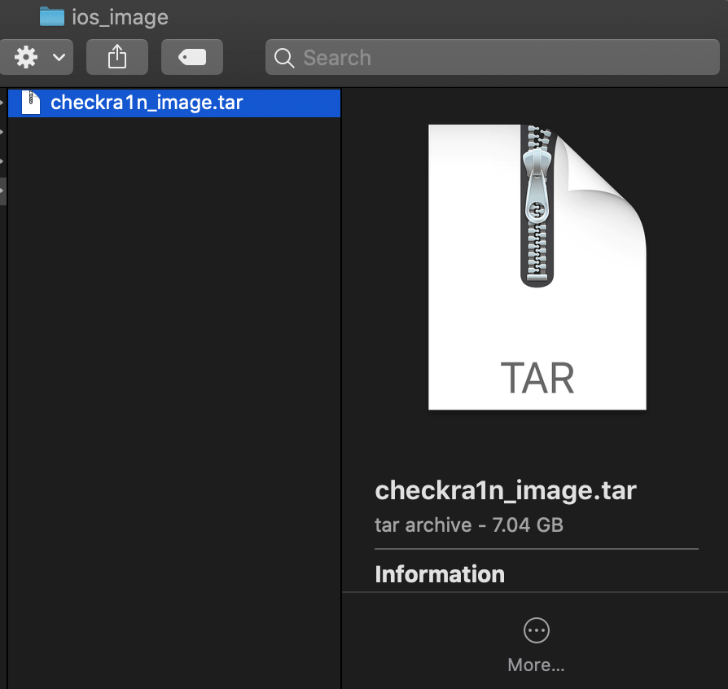
View the .tar file in Finder. It was 7.04 GB.
Unzip the file and get the folder.
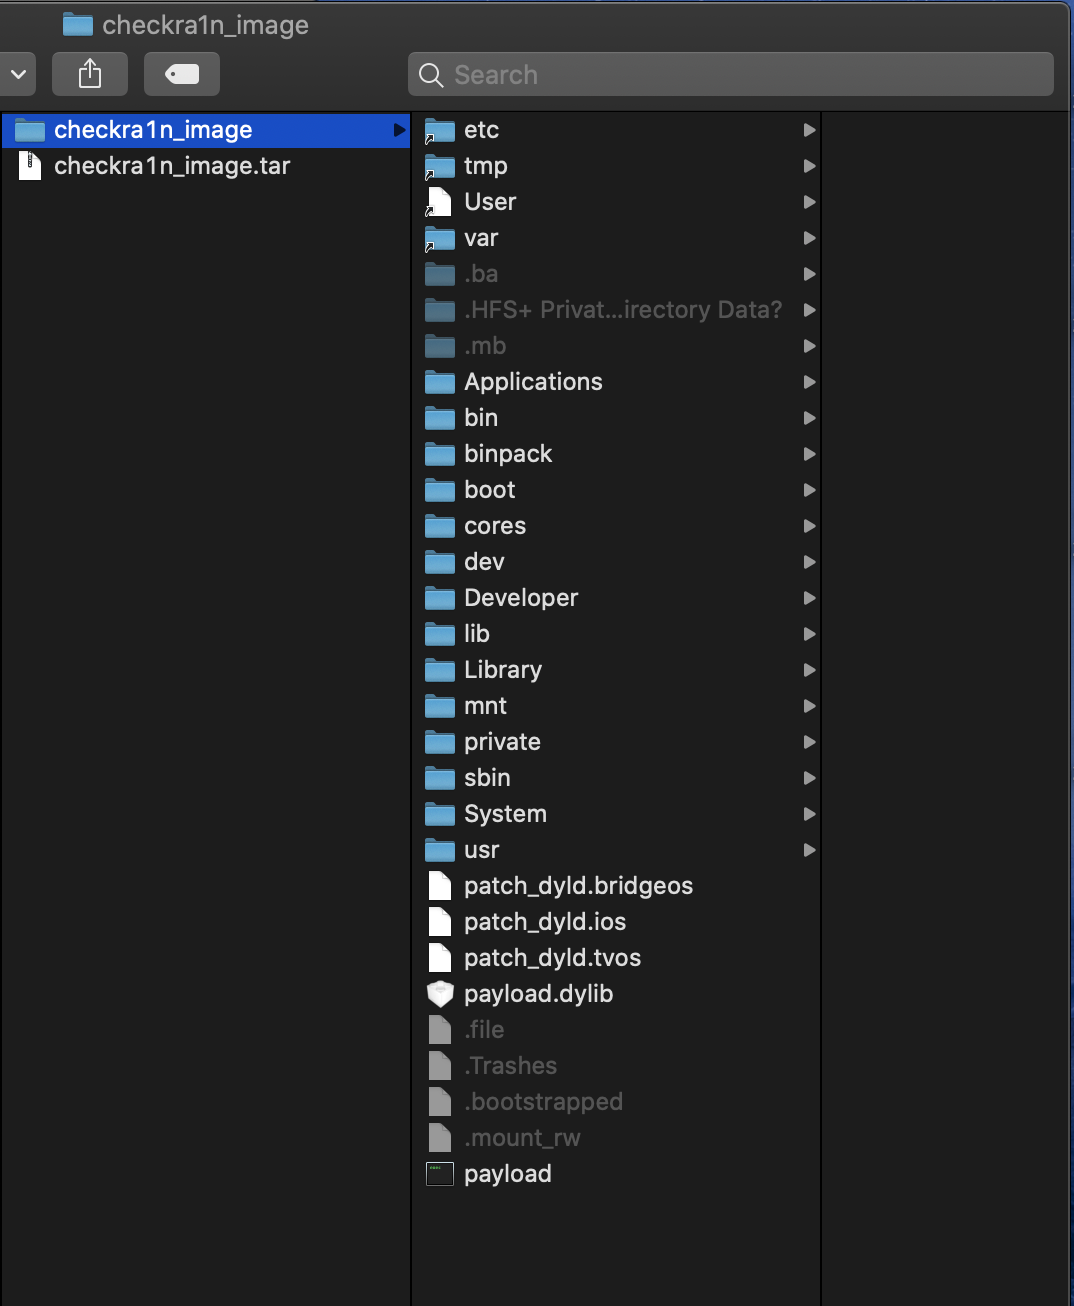
The artifacts related to photos were stored at the following path:\private\var\mobile\Media\DCIM
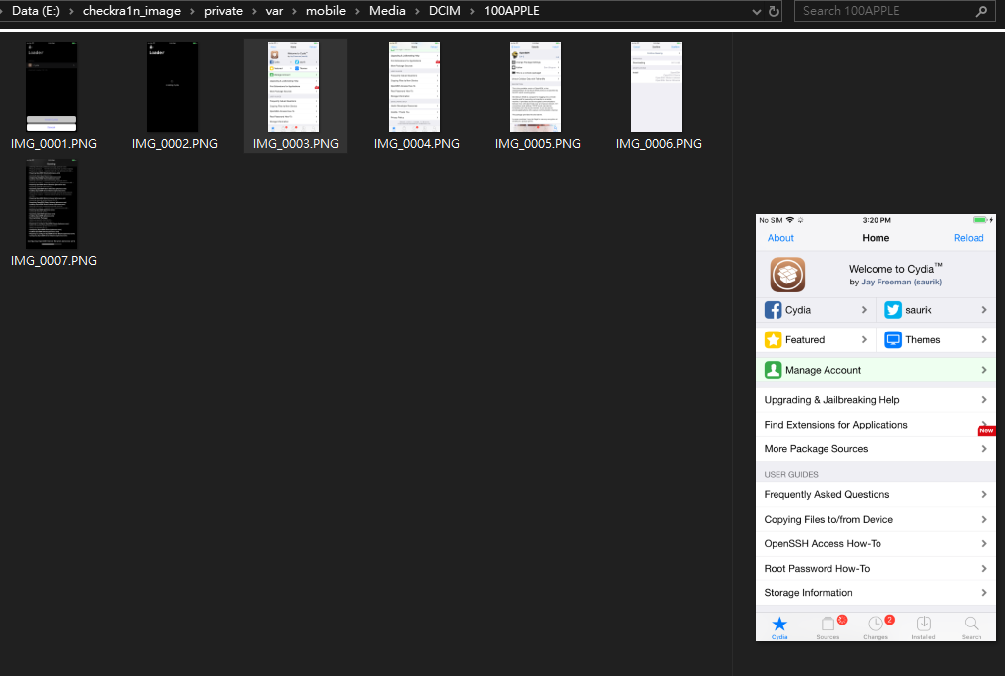
Some screenshots were added before the imaging.
The artifacts related to Safari were stored at the following path:\private\var\mobile\Library\Safari
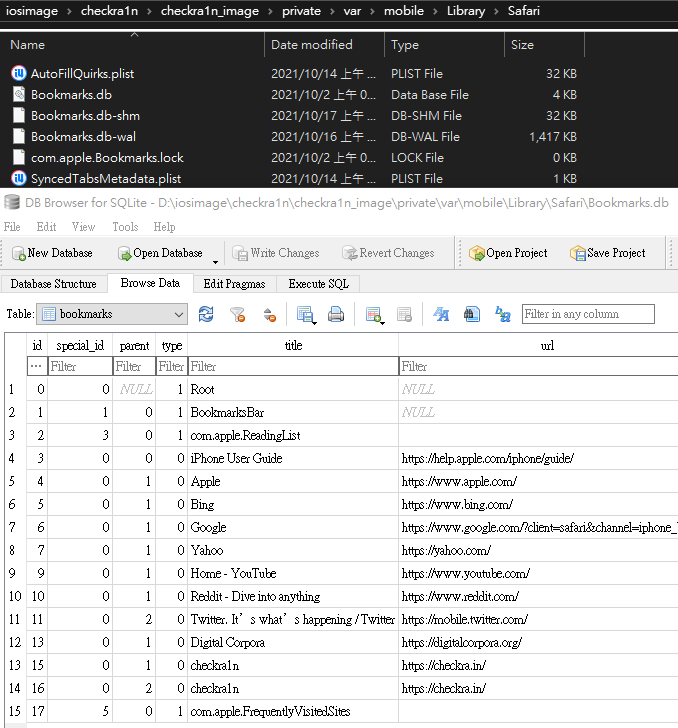
Files with extension .db were SQLite data and can be viewed by 3rd party software DB Browser, and there was a list of data correlated to bookmarks in Bookmarks.db.
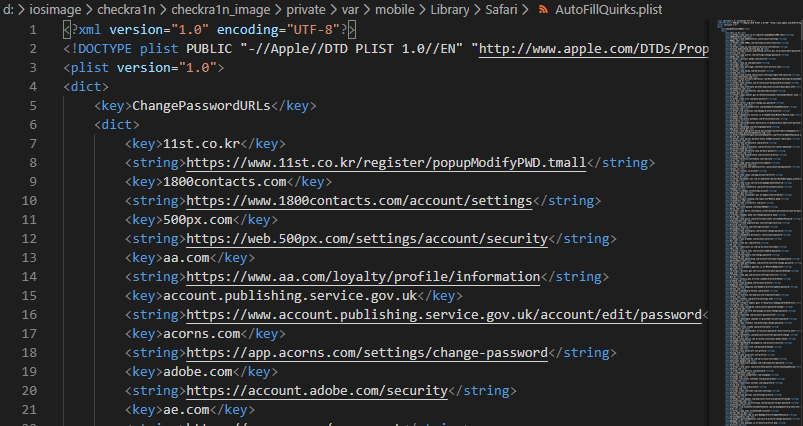
Files with extension “plist” were setting files specific for macOS or iOS. To open these files, I installed an extension called "Binary Plist" on a text editor VScode.By open the file AutoFillQuirks.plist, there were many domains that will be auto-filled when the user searches them on the browser Safari.
*In this case, there was no History.plist, which should contain the browsing history of Safari in the folder if we just check it manually.
The storage location of History.plist will vary in different versions of iOS. We may want to use some tools to analyze it. It will be discussed in the Analysis section.
After completing the Full Filesystem image and initially observing the artifacts related to Photos and Safari, the section of checkra1n - Full Filesystem Image was finished. The next step was to wipe the device again, begin the unc0ver - Full Filesystem Image section, and repeat the above steps.
Full Filesystem image – unc0ver
After wiping and starting up the device, we will use unc0ver to jailbreak it. Unlike checkra1n, which uses checkm8 vulnerabilities, unc0ver uses voucher_swap (CVE-2019-6225) and SockPuppet (CVE-2019-8605) to achieve Jailbreak on iOS 12.1. Because these are not Boot ROM vulnerabilities, it is likely to be unavailable in the next iOS update.
Compared with checkra1n, unc0ver supports multiple OS and has an alternative way to do a jailbreak without a computer. (Unstable and will encounter a lot of ads.)
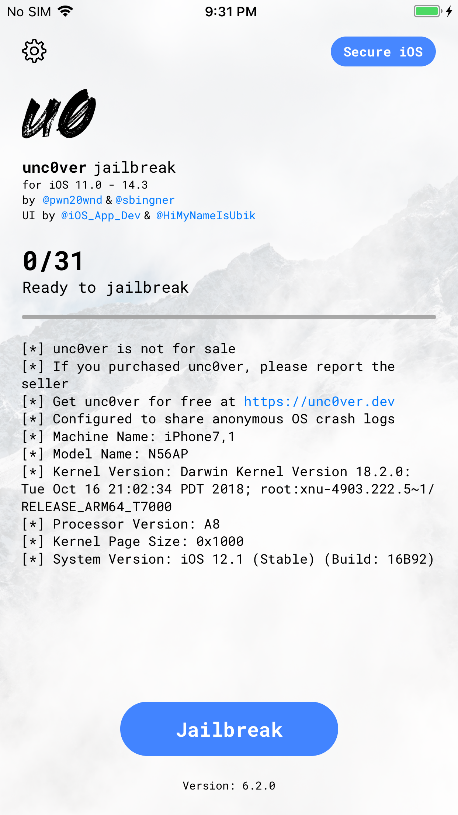
Typically, the steps to use unc0ver for Jailbreak were as follows
1. Visit the unc0ver official website https://unc0ver.dev/ and download the unc0ver ipa file (unc0ver_Release_6.2.0.ipa in this case) and a third-party application installer “Impactor”.
*Cydia impactor requires an apple developer account to sign the app. Recommend using AltStore with this post as an alternative.
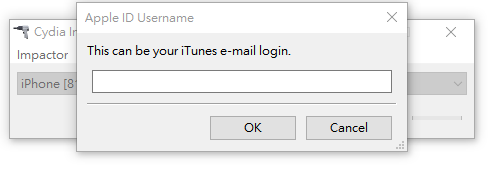
2. Use Impactor to install unc0ver_Release_6.2.0.ipa to the device. During this process, we need an apple id to sign the ipa application.
3. Find the unc0ver application on the device and run it.
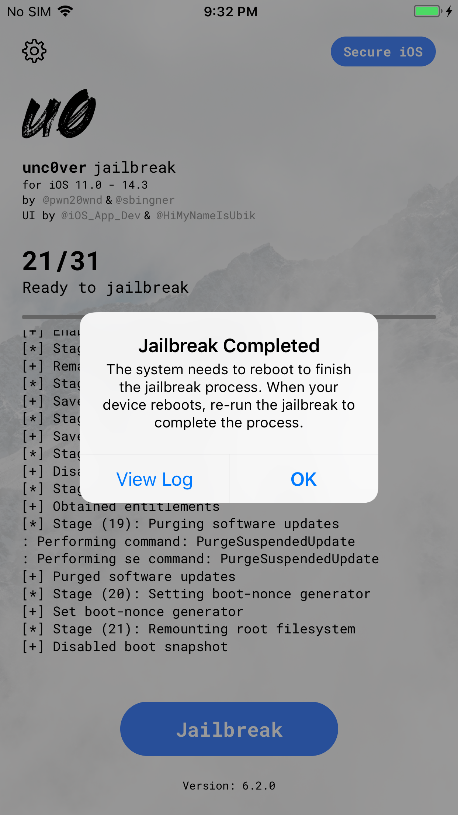
4. After clicking Jailbreak, unc0ver will automatically complete the Jailbreak and restart the device.
Here are some screenshots of the process:
Impactor_0.9.55
Impactor and unc0ver_Release_6.2.0.ipa.

Run the Impactor and Drag unc0ver_Release_6.2.0.ipa to it.

Login with an apple ID.
When the unc0ver app successfully install on the device. Launch it and click the bottom Jailbreak. The Jailbreak will automatically complete.

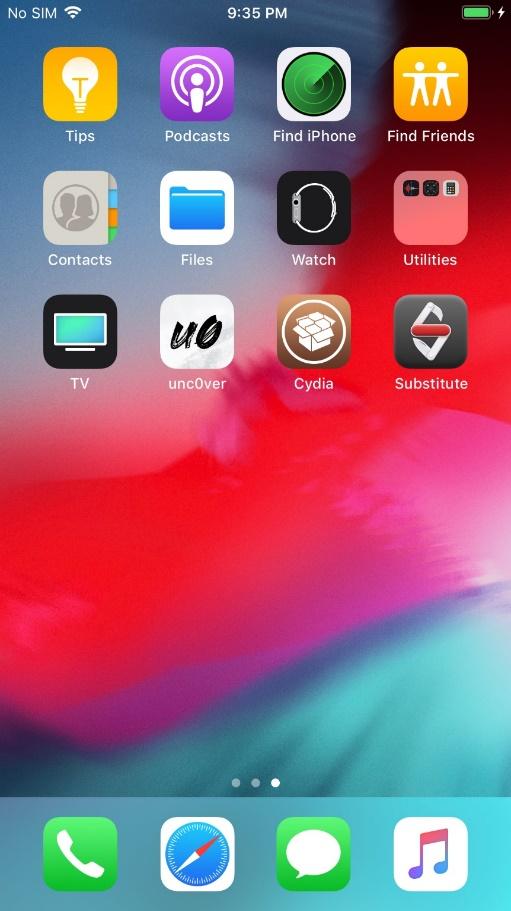
Cydia and Substitute (Some settings of unc0ver) will automatically be installed.
After the Jailbreak was completed, the rest of the work about installing OpenSSH and data population was the same as that of checkra1n part. As always, I also added some screenshots and safari browsing records as Data population.
Configure iproxy
Same as before, we run the command "iproxy 8888 22" to set the local TCP port 8888 and device TCP port 22 for SSH connection. This time we changed the port from 4242 to 8888, but it does not affect the result.

Open another terminal and run the command "ssh root@127.0.0.1 -p 8888"to make an SSH connection.
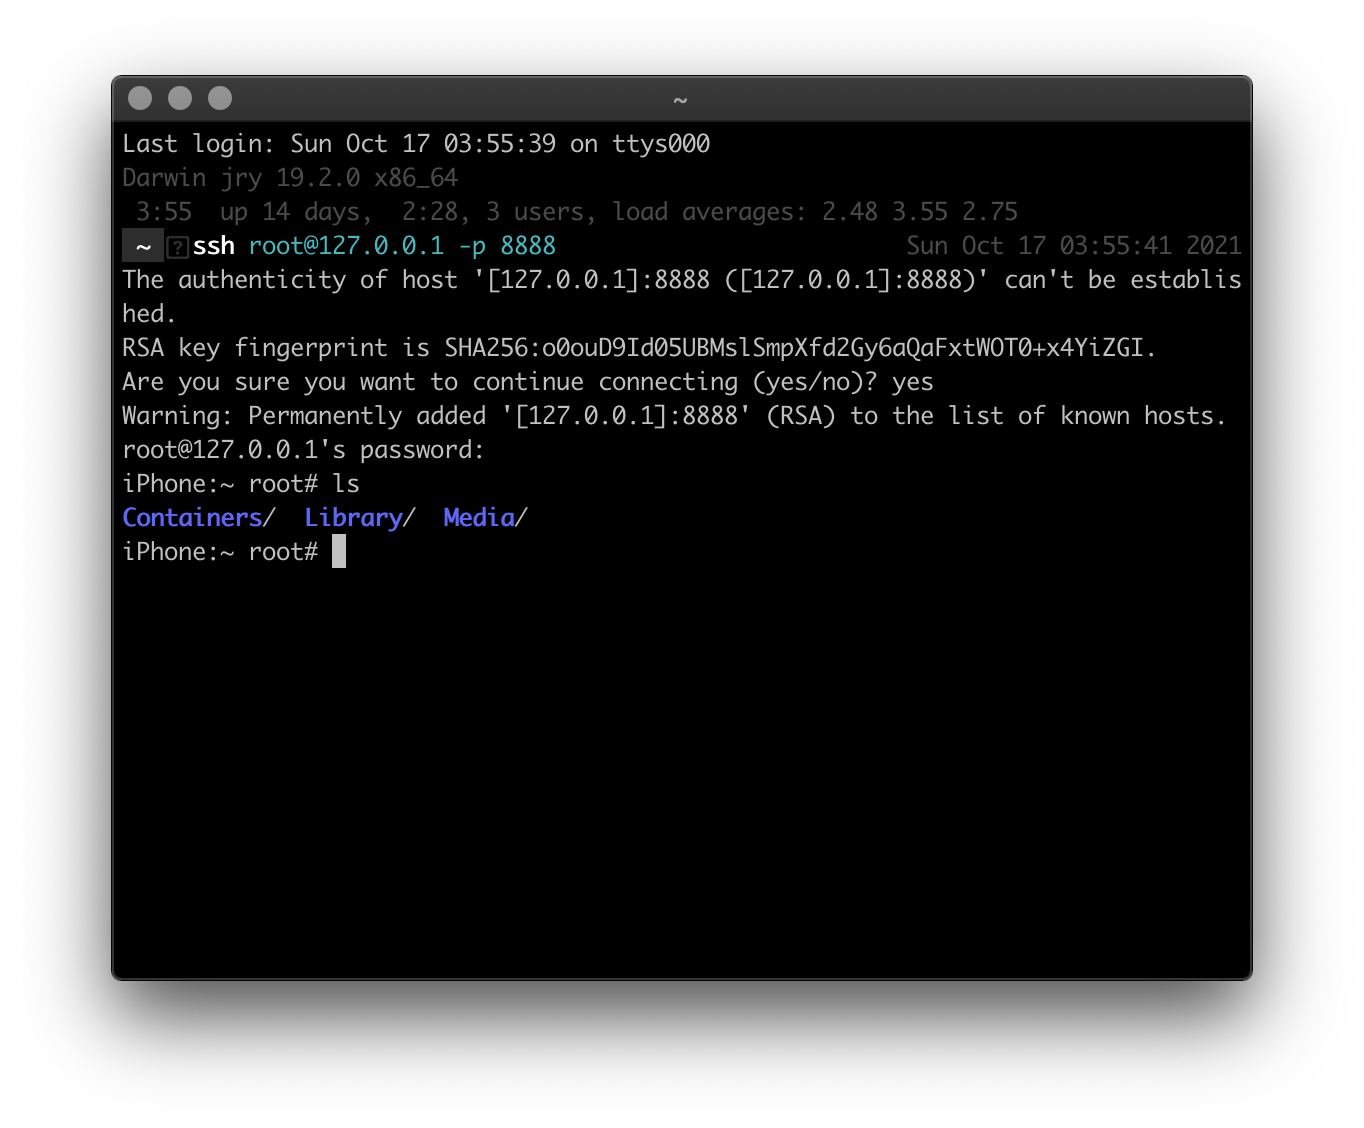
Compared with the use of checkra1n, there was an additional Containers folder.
Exit the SSH connection and reconfigure iproxy and run the command "ssh root@127.0.0.1 -p 8888'tar -cf-/'> [Destination folder/filename.tar]". Then we can wait for the system to export the Full Filesystem image to the .tar file to the destination path.
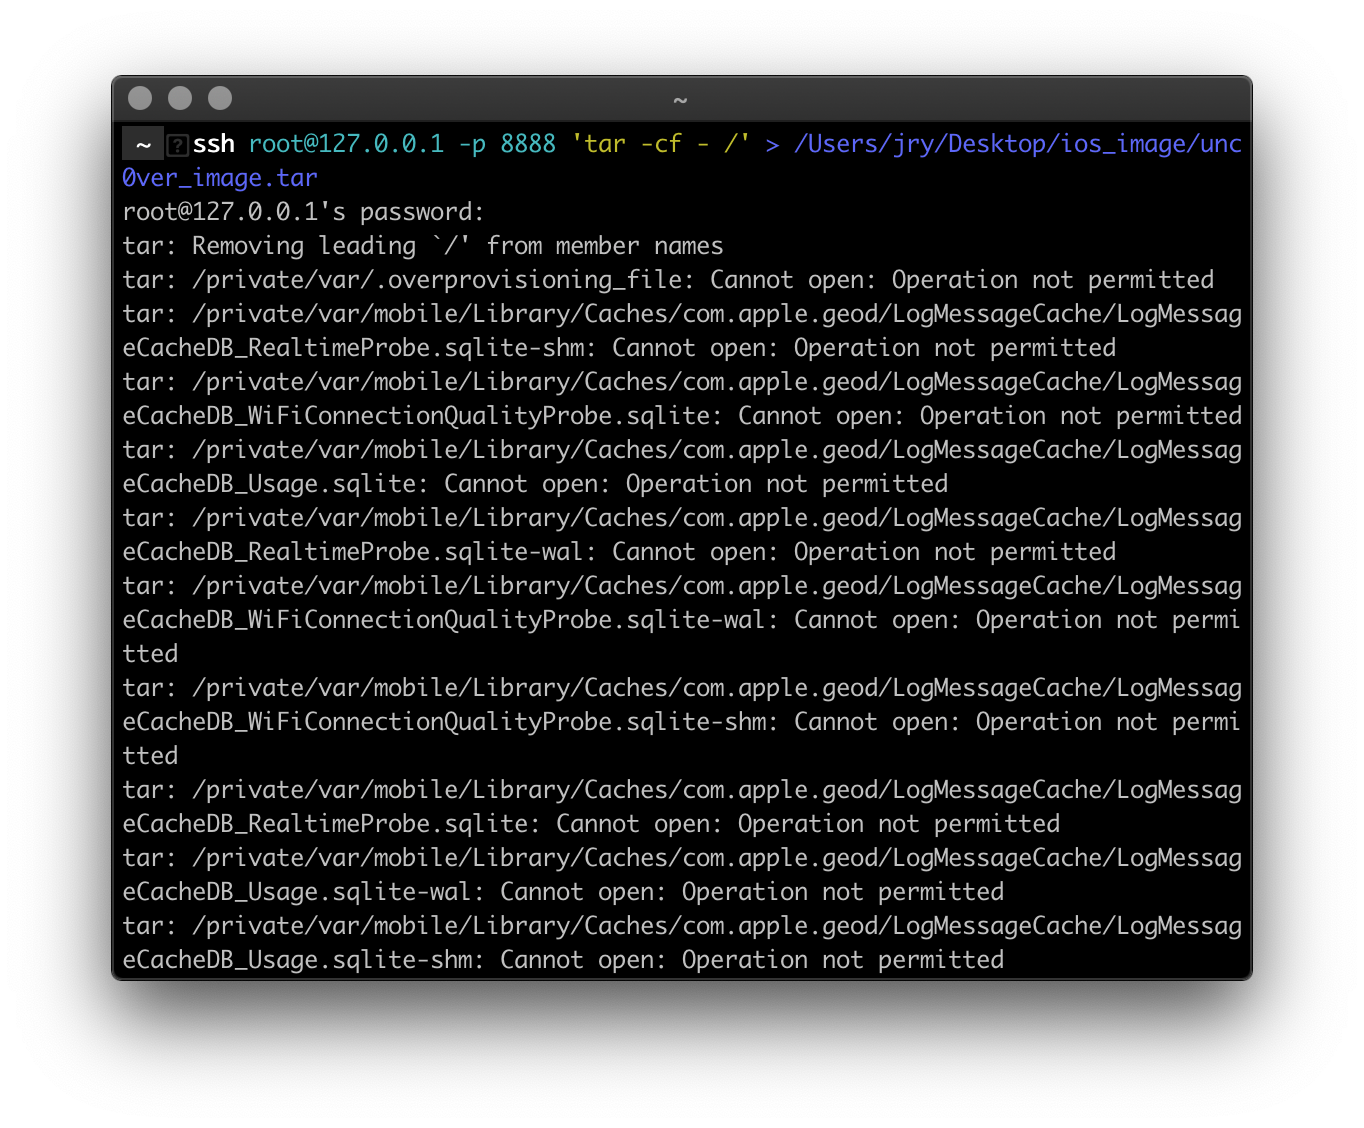
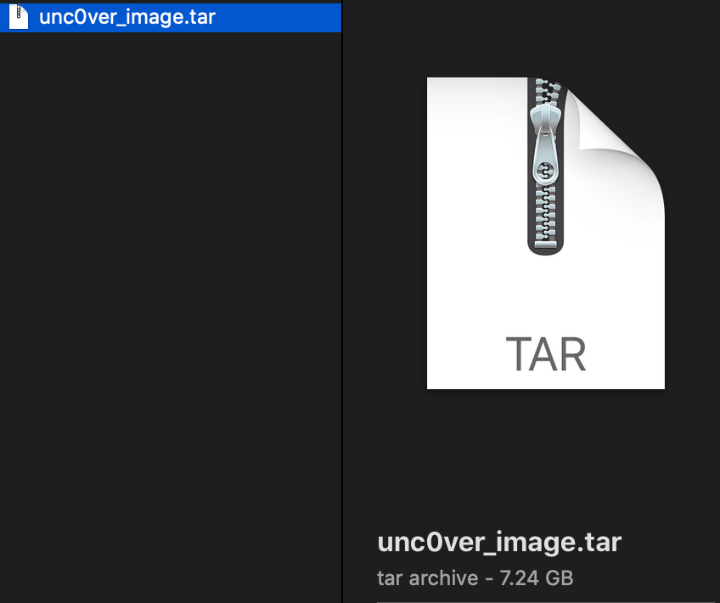
View .tar file in Finder. The file was 7.24 GB.
Unzip the file and get the folder.
The folder format was roughly the same but compared to when using checkra1n. There were some files added and missed. The file differences were as follows:
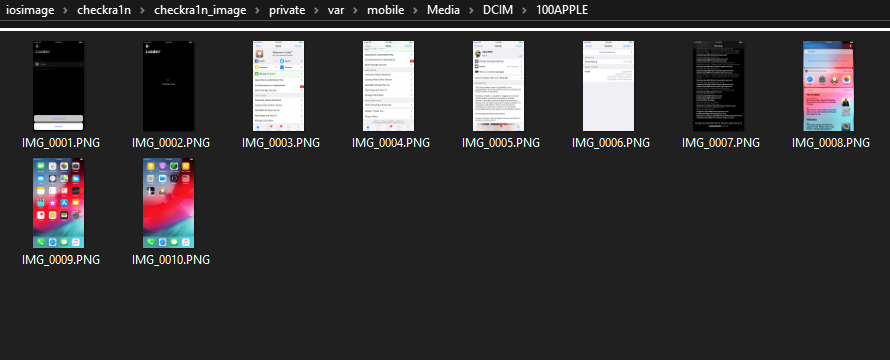
The artifacts related to photos were stored at the following path:/private/var/mobile/Media/DCIM
There were some screenshots that were added before imaging.

The artifacts related to Safari were stored at the following path:\private\var\mobile\Library\Safari

Compared with checkra1n, the file was roughly the same. Also, open with DB Browser, there was some information about bookmarks in Bookmarks.db. and AutoFill setting in AutoFillQuirks.plist.

Image Analysis
Now, we successfully created two iOS 12.1 Full filesystem images based on jailbreak tools "checkra1n" and "unc0ver" and tried to observe the previously populated safari data from each image. However, suppose we search with keywords such as "iOS12 safari history file, safari artifacts, safari forensics" on google. Many articles point to the location of safari history in \private\var\mobile\Library\Safari\History.plist or History.db. It did not match our situation.
Therefore, we may want to use some tools to analyze these two images.The following three tools were used in this project:
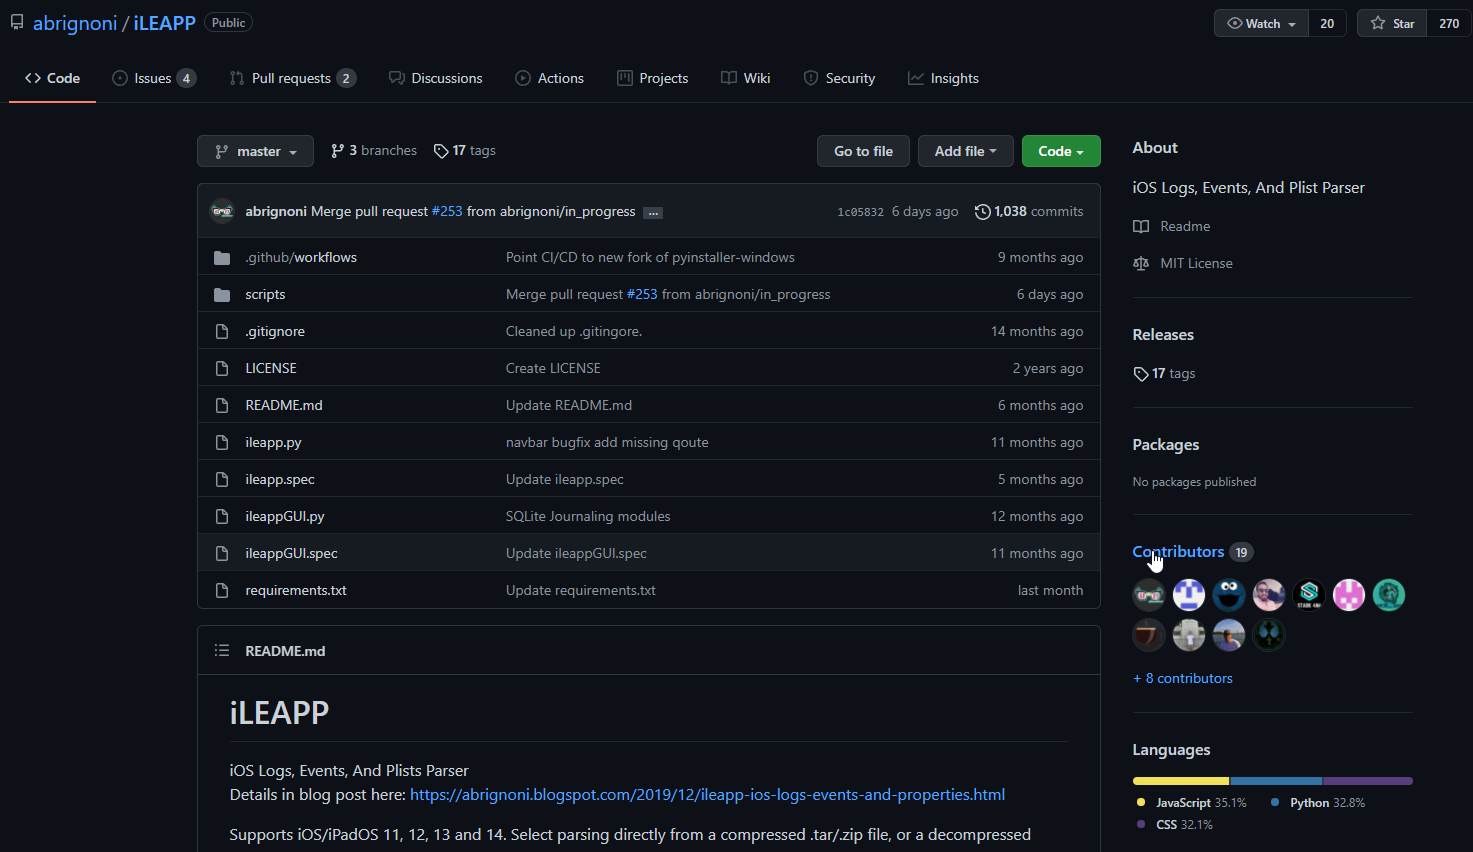
1. abrignoni/ iLEAPP:
iLEAPP is an open-source data parser developed by the author abrignoni based on python and available in iOS versions 12 and 13. It can directly parse the iTunes backup folder and Full filesystem image folder and output the results in HTML format. This tool also provides GUI operations Version, and this article will use screenshots of the GUI interface as examples. https://github.com/abrignoni/iLEAPP
2. Beyond Compare 4
Beyond Compare 4 is a document comparison tool developed by Scooter Software. It supports the comparison of two folders or files and displays the differences in the left and right split windows in red and purple. Beyond Compare 4 is not freeware, but it provides a 30-day trial which is enough for this project. https://www.scootersoftware.com/index.php
3. Magnet/ For Android and iOS: Targeted Locations Quick Reference Guide
Targeted Locations Quick Reference Guide is a QRG written by Magnet forensics and available for iOS and Android operating systems. It records the locations of common artifacts such as browsing history and call history in these two operating systems. https://www.magnetforensics.com/resources/targeted-locations-quick-reference-guide-android-and-ios/
Before analyzing the image, we need to install those tools.
iLEAPP
The first step to installing iLEAPP was to download the source code from Github.
Then decompress the iLEAPP-master folder and run the PowerShell on the folder. Run the command “python -m pip install -t .\requirements.txt” to install required packages.
* Python (3.9 recommended) and pip are required.
====================Installation debugging begin====================

During the first installation, I encountered the error message,
No module named 'magic'.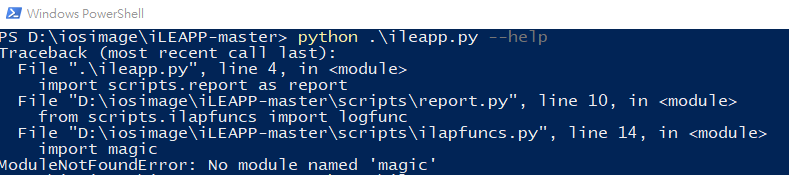
Run the command “python -m pip install python-magic”

Error message appears again, failed to fine libmagic.
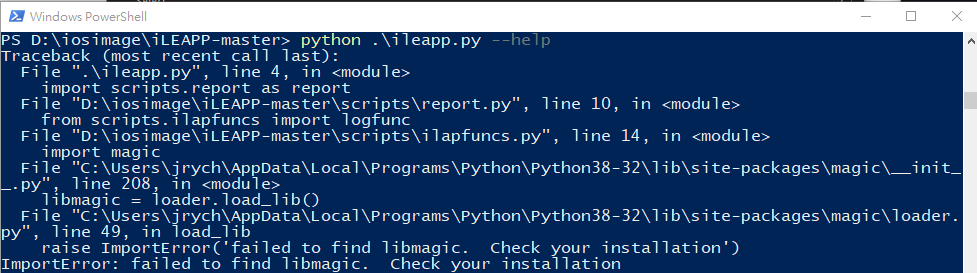
Found the solution: Install the package “python-magic-bin==0.4.14” in this article.https://github.com/Yelp/elastalert/issues/1927
Run the command “python -m pip install python-magic-bin==0.4.14”

Installation succeeded. Displayed the help information.
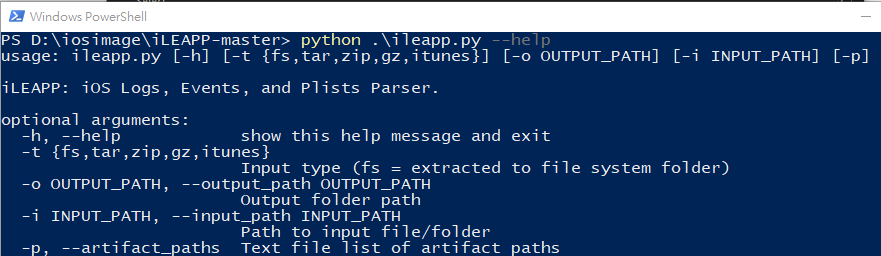
=====================installation debugging end====================
Use the command “python .\ileappGUI.py” to executed the program in the GUI.


Specify the source of the data and the location of the report, and then automatically output the report.
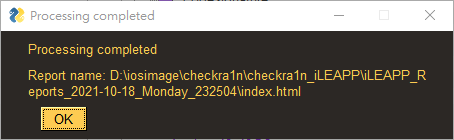
After the output, the report will automatically open with the default browser. Click the sidebar to select the data type.
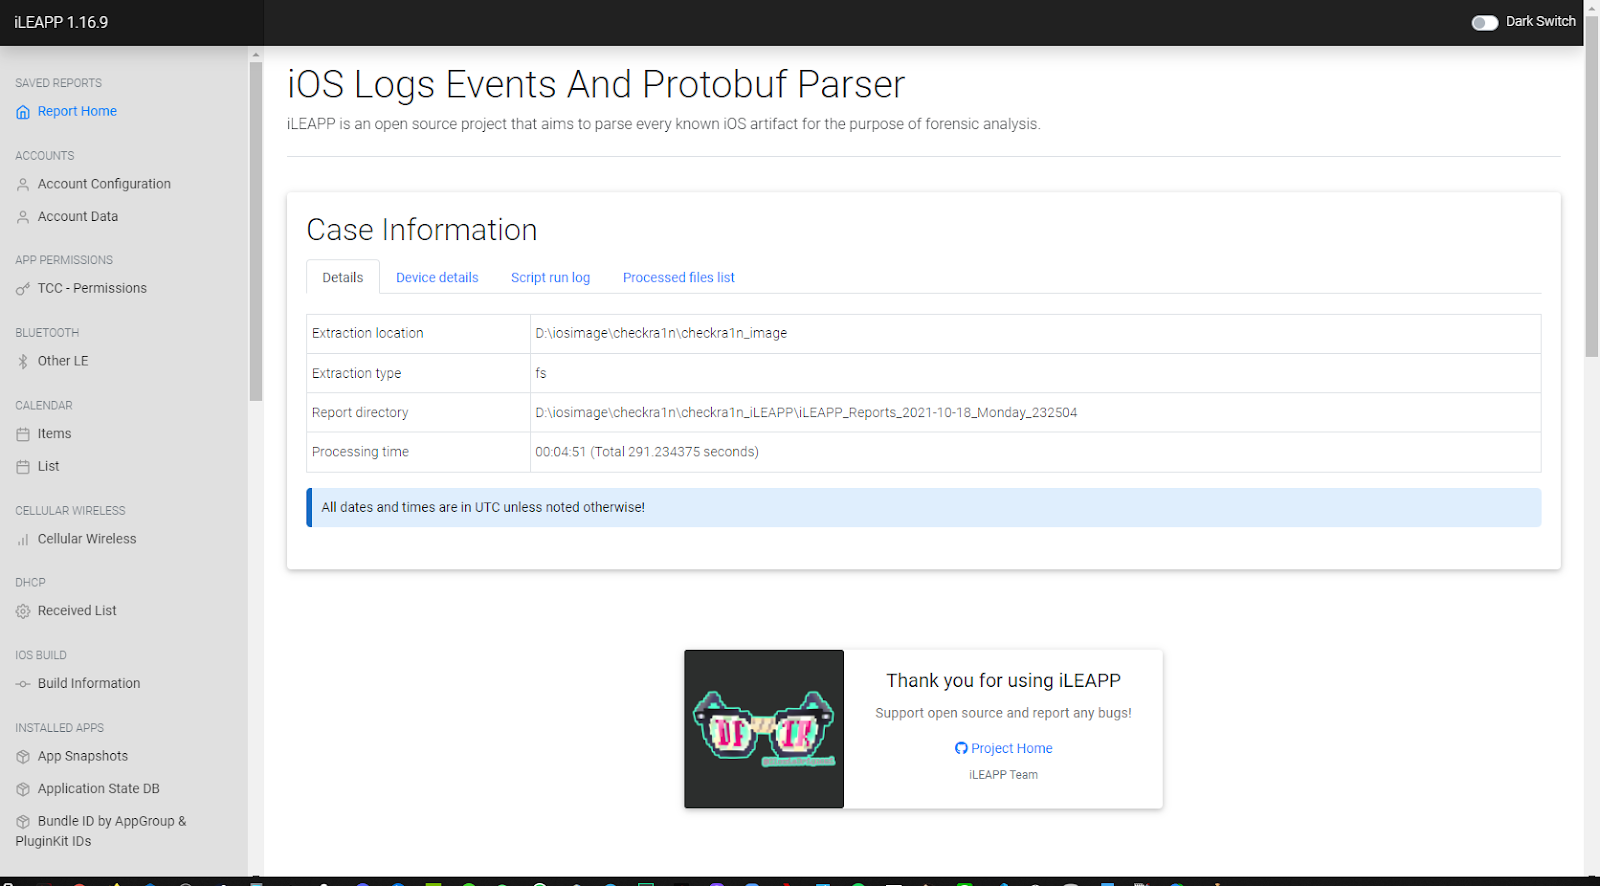
The “WiFi known networks” data displayed the wifi devices have been connected.
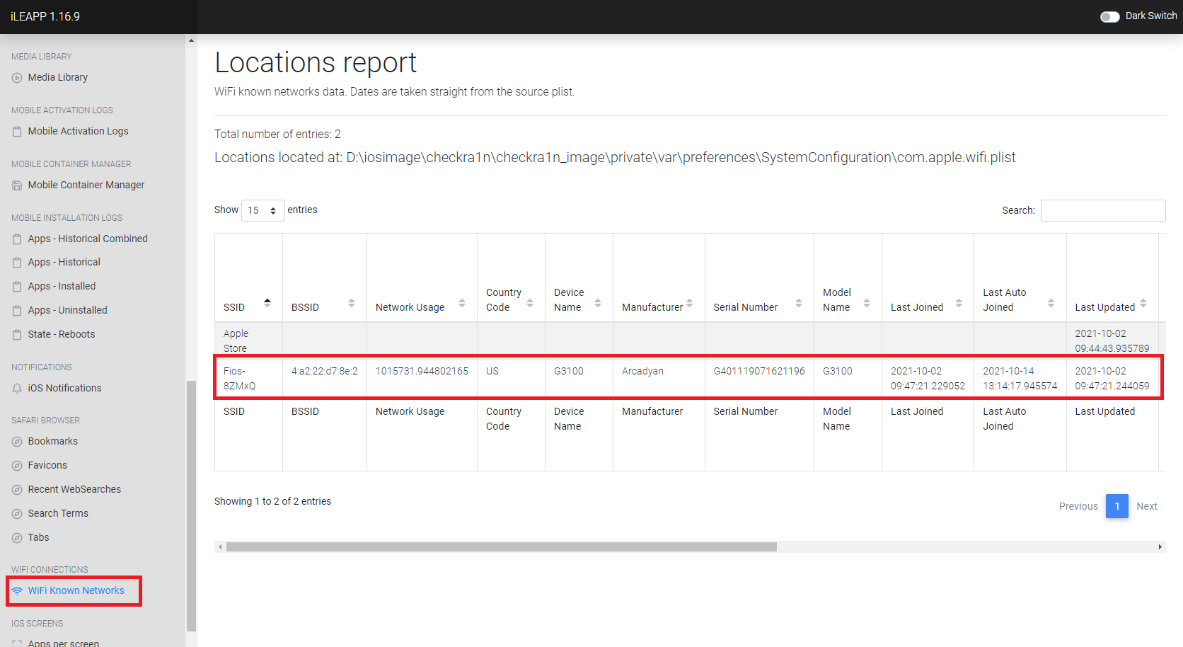
The “Safari Browser report” includes many of the data related to safari. The file path above can answer questions about the location of Safari artifacts.
D:\iosimage\checkra1n\checkra1n_image\private\var\mobile\Containers\Data\Application\98B298A7-C335-4371-96EE-4A8476864E99\Library\Safari\History.db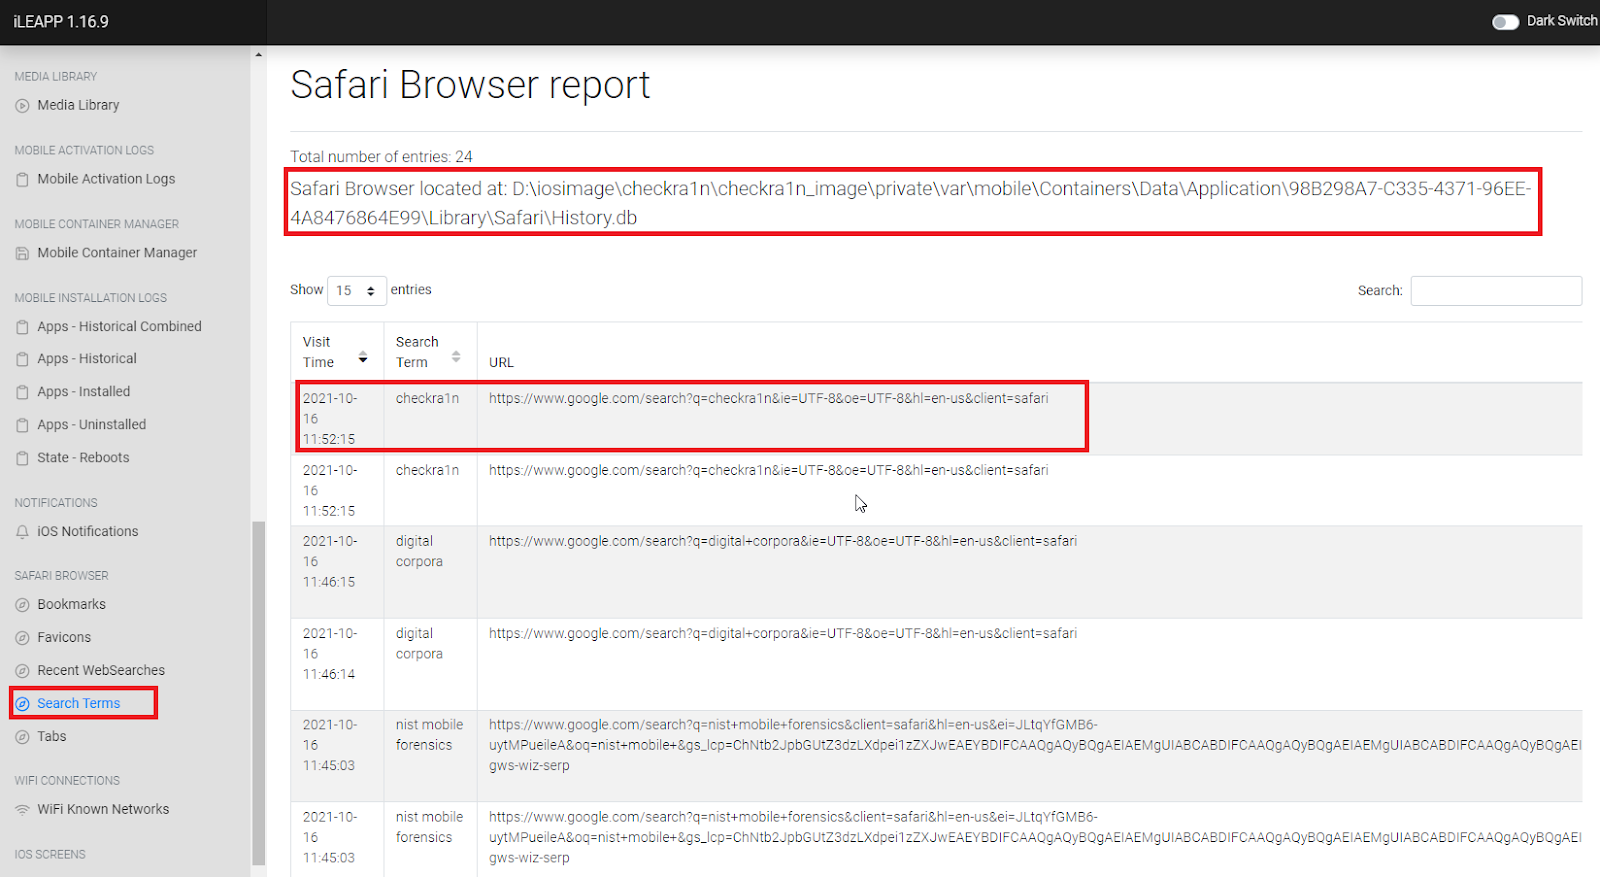
Open the path with file explorer, we successfully found History.db.

Open History.db with DB Browser and found the title and timestamp of the browsing history in the "history_visits" table.
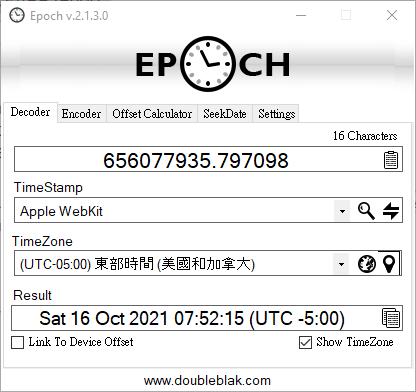
In order to verify the iLEAPP data and understand the iOS data storage form, we can compare the timestamp in the database and the “browsing time” in the iLEAPP report.

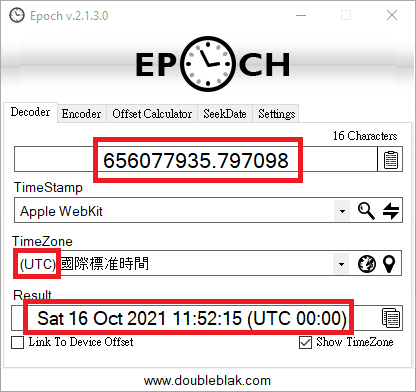
If we parse the timestamp with Epoch v.2.1.3.0, The timestamp format of iOS will be “Apple WebKit.” We got the same date, minute, and second as in the iLEAPP report. The different hours may be caused by the time zone.
Convert the time zone to UTC and compare again. Get the same hour, verification completed.

It is worth mentioning that iLEAPP provides search records instead of browsing records. The timestamp and Title in History.db were recorded in the history_visits table, but the URL was recorded in the history_items table, which may cause difficulties in data reading.
Beyond Compare 4
In addition to using iLEAPP to generate reports and verify, it was also the purpose of the project to compare Full filesystem images based on two jailbreak tools. *The installation of Beyond Compare 4 is as simple as most software. We will not discuss this part here.
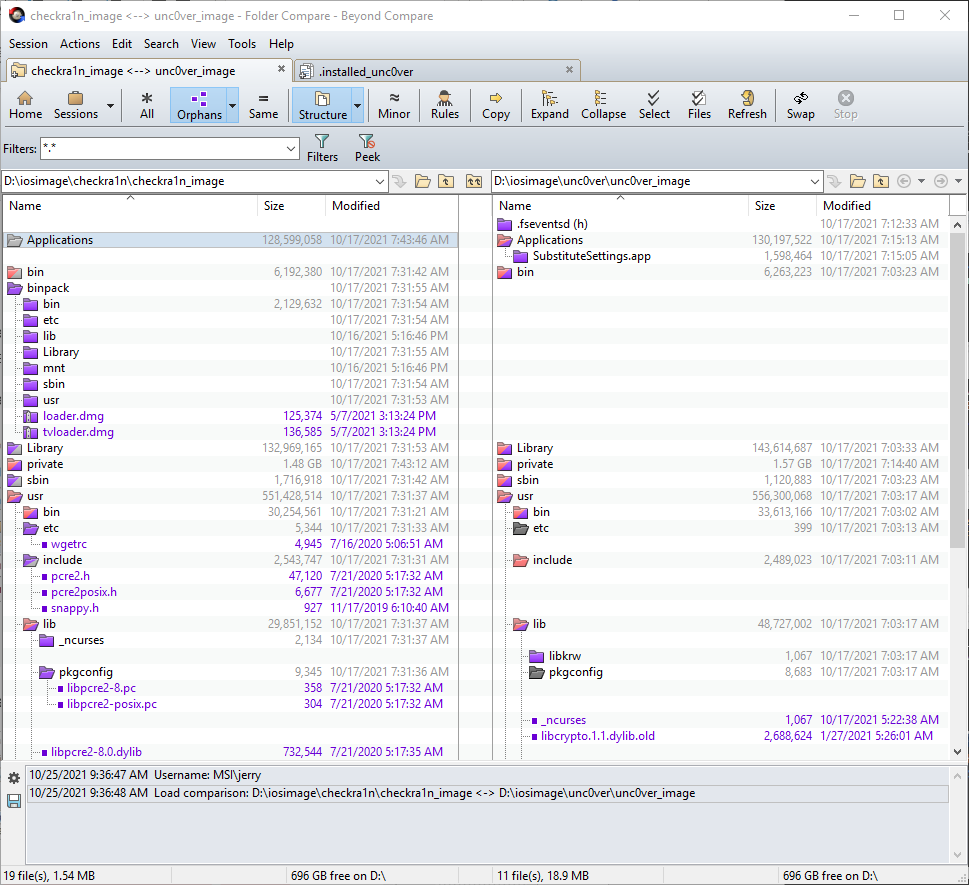
Set the checkra1n_image folder on the left and the unc0ver folder on the right in the Beyond Compare 4.As shown in the screenshot, unique files were marked in purple, and files that have differences on both sides were marked in red.
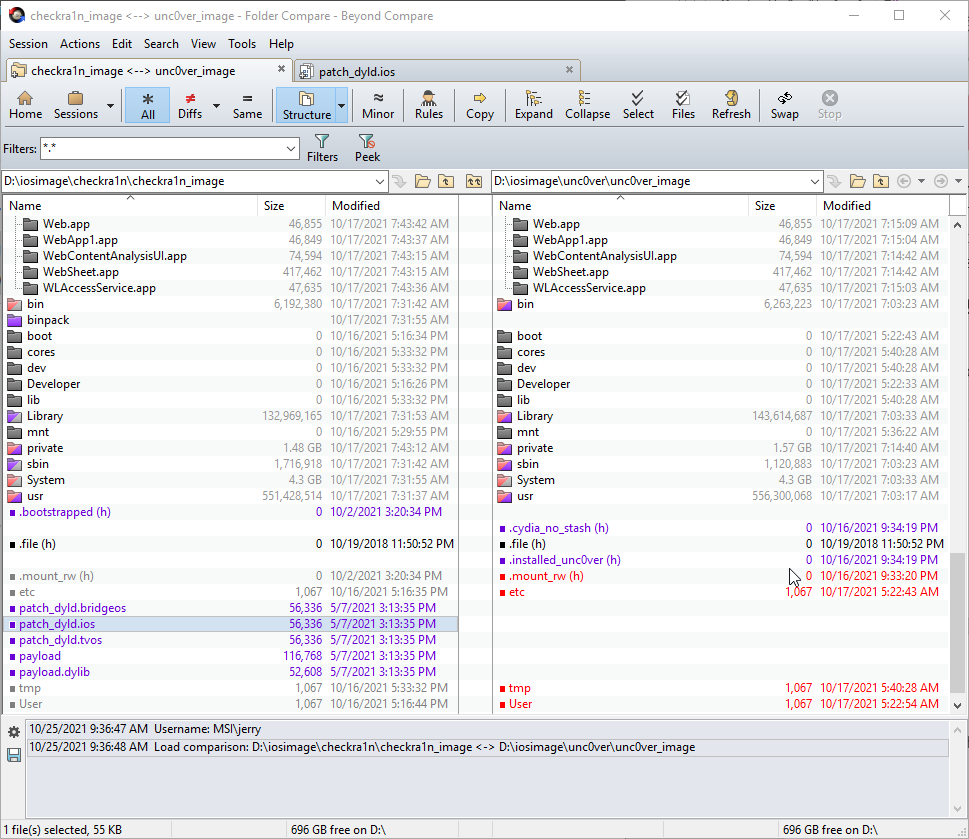
The comparison function sometimes does not work and will mark files in red, it may turns gray after double-clicking to view it.
It can be found that both checkra1n and unc0ver have created some files in the root folder. One of the purposes may be to allow the jailbreak tool to recognize the jailbreak status and prevent secondary writes to the system.
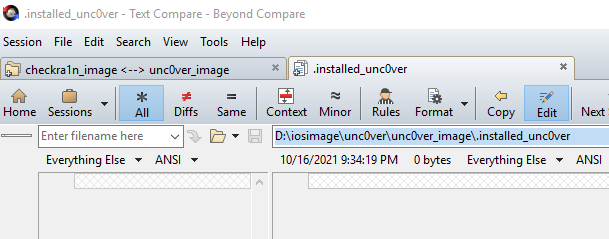
The screenshot below was an empty file ".installed_unc0ver"
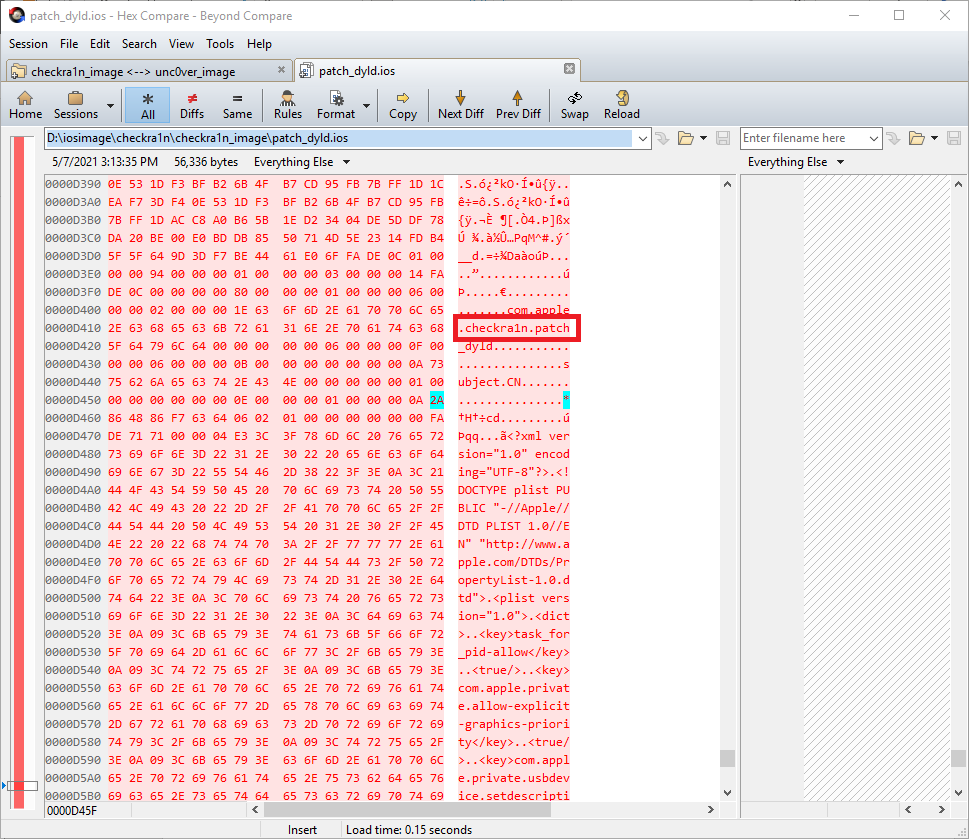
There was also the checkra1n string found in the file "patch_dyld.ios"
Select the Orphans option in Beyond Compare to better see the files owned by only one side.
Magnet/ For Android and iOS: Targeted Locations Quick Reference Guide
After filling in some basic information on the Magnet Forensics page, the Targeted Locations Quick Reference Guide can be accessed. This QRG records location of six data types in iOS, including Safari Browser Data, Geolocation, User Photos, Mail App, System Artifacts, and Communication.
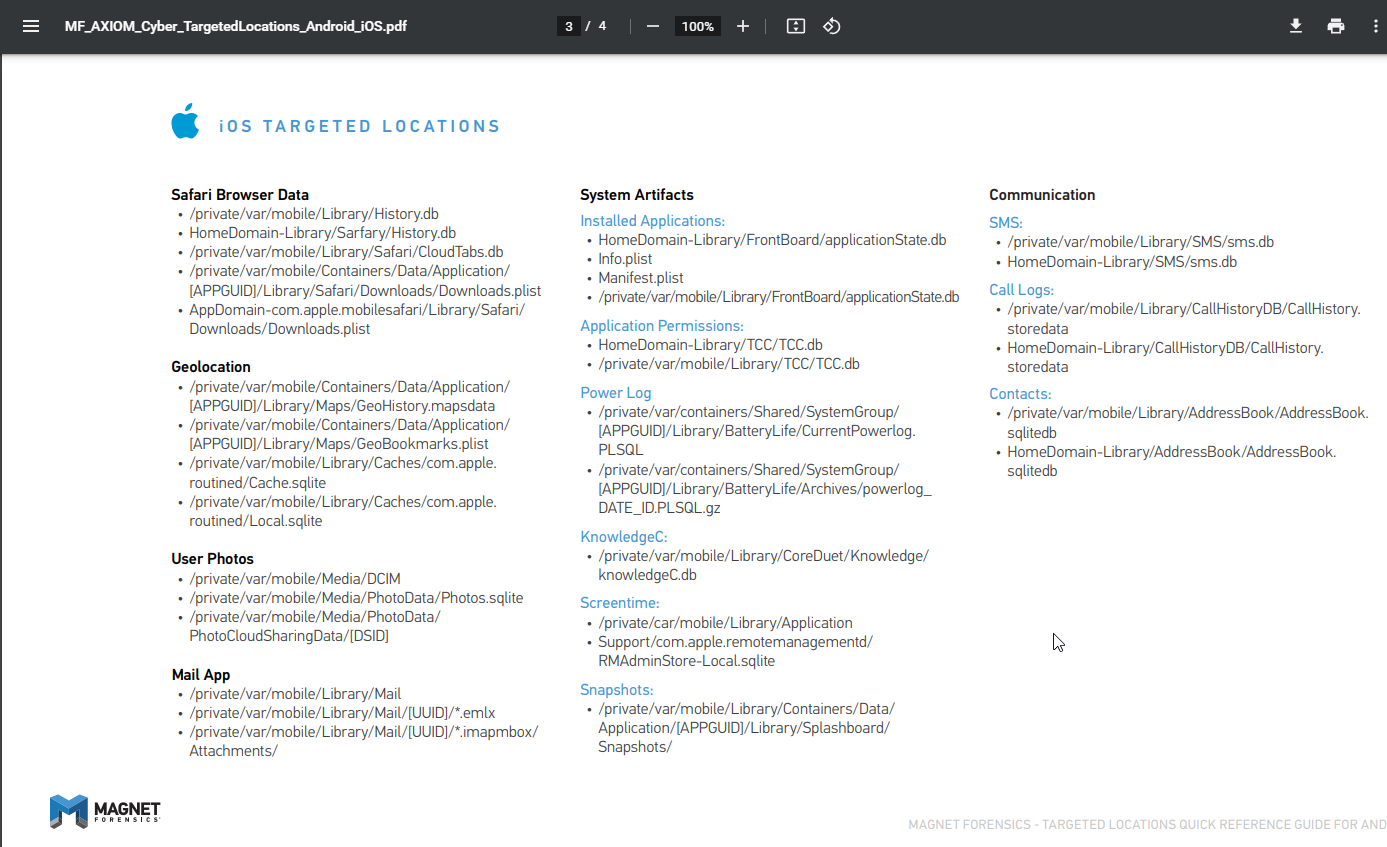
Among them, Safari Browser Data also contains the same location as our previous search results on google “/private/var/mobile/Library/History.db”
Although the location of History.db was different from the situation of this project, the information it provides about “/private/var/mobile/Containers/Data/Application/APPGUID]/Library/Safari/” folder may contain artifacts is still helpful.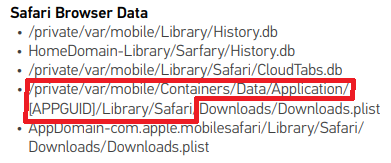
User photo was consistent with the location provided by QRG
\private\var\mobile\Media\DCIM
Conclusion
Overall, the purpose of this project was roughly achieved. These tools can help increase the efficiency of finding specific information or files. And can be verified interactively by the data provided by different tools.
It's a pity that when comparing the Full filesystem image based on checkra1n and unc0ver, there was no significant difference in functionality. Although they were two jailbreak tools based on completely different vulnerabilities, they seem to be well provided the functions we expected for jailbreaking.
Hash Checksums
Jerry_Chang_checkra1n_Image.tar (6.66 GB):
MD5: F17D326A6F3D597B619574CFD79D16BE
SHA1: C47367CA481B1F5122608D300C8B9F30DF58E3B9
Jerry_Chang_unc0ver_Image.tar (6.73 GB)
MD5: E5C031F31527A42E04CB1FB78E94D3ED
SHA1: 3478B7C9B1347CFCCD4C8E22899871DA62D97275
MD5: F17D326A6F3D597B619574CFD79D16BE
SHA1: C47367CA481B1F5122608D300C8B9F30DF58E3B9
MD5: E5C031F31527A42E04CB1FB78E94D3ED
SHA1: 3478B7C9B1347CFCCD4C8E22899871DA62D97275
Full Filesystem Image samples made with two jailbreak tools will be available for download here.
Acknowledgement
I would like to express a special thanks to Jessica Hyde for giving precious suggestions and feedback throughout this project.
References
Abrignoni. (n.d.). Abrignoni/ileapp: IOS logs, events, and Plist parser. GitHub. Retrieved November 1, 2021, from https://github.com/abrignoni/iLEAPP.
Beyond Compare 4. Scooter Software: Home of Beyond Compare. (n.d.). Retrieved November 1, 2021, from https://www.scootersoftware.com/index.php.Checkra1n jailbreak, Checkm8 Exploit Analysis: CHECKM8. CheckM8 Software. (n.d.). Retrieved November 1, 2021, from https://checkm8.info/blog/checkra1n-jailbreak-exploit.
Checkra1n. checkra1n. (n.d.). Retrieved November 1, 2021, from https://checkra.in/.
Edwards, S. (2017, March 22). IOS imaging on the cheap! mac4n6.com. Retrieved November 1, 2021, from http://www.mac4n6.com/blog/2016/3/23/ios-imaging-on-the-cheap.
For Android and IOS: Targeted locations quick reference guide. Magnet Forensics. (2021, June 2). Retrieved November 1, 2021, from https://www.magnetforensics.com/resources/targeted-locations-quick-reference-guide-android-and-ios/.
Homebrew. (n.d.). Retrieved November 1, 2021, from https://brew.sh/.
Importerror: Failed to find libmagic. check your installation · issue #1927 · yelp/elastalert. GitHub. (n.d.). Retrieved November 1, 2021, from https://github.com/Yelp/elastalert/issues/1927.
IMPORTERROR: No module named Magic · issue #317 · Mukulhase/WebWhatsapp-Wrapper. GitHub. (n.d.). Retrieved November 1, 2021, from https://github.com/mukulhase/WebWhatsapp-Wrapper/issues/317.
Libimobiledevice · a cross-platform FOSS library written in C to communicate with IOS devices natively. libimobiledevice. (n.d.). Retrieved November 1, 2021, from https://libimobiledevice.org/.
Patel, M. (2020, December 17). Mobile device forensics - IOS 14 manual forensic acquisition and User Data Population. Medium. Retrieved from https://pateldfir-20.medium.com/mobile-device-forensics-ios-14-manual-forensic-acquisition-and-user-data-population-cbfe2933bc21.
Unc0ver. unc0ver. (n.d.). Retrieved November 1, 2021, from https://unc0ver.dev/.

Comments
Post a Comment